Peltier Battery Cooler
by: dosman
4-29-03
Now that I have a
functional
Clodbuster again, I decided to invest in the
new NiMH batteries that have sprung up. The largest capacity Sub-C NiMH's I've
found are 3300mAh, they have more than double the lifetime of the NiCD's I had
growing up. So, if I'm going to invest $50 or more in a single battery pack, I'm
going to take proper care of them for once ;-). I just am not the kind of person
to put my batteries up for the night to let them cool. I want to play! I used to put my batts in a ziplock bag and put then in the sink. I
didn't like doing
that, but it worked.

Anyway, I
need a way to cool down my batteries to room temperature in 5 minutes or less
without using water.
So, I will give my shot at a peltier based battery cooler. I have seen brand
name battery and motor coolers out there, but they are just fan/heat sink based
units. I think I can beat those units into the ground with a peltier based
cooler. For those that are not aware, there is a relatively new device called a
peltier that has come about. Well, actually their invention is about 20 years
old, but they have recently either come down in price or have become widely
known to general laypersons, like me.. Basically, it's
an electric heat sink. You apply current and it moves all the heat from one side
to the other, so you get one really cold side and one really hot side. Cpu
overclockers have been loving them for a couple years now to ice down their
cpu's to sub freezing temps, or at least very much lower than what was
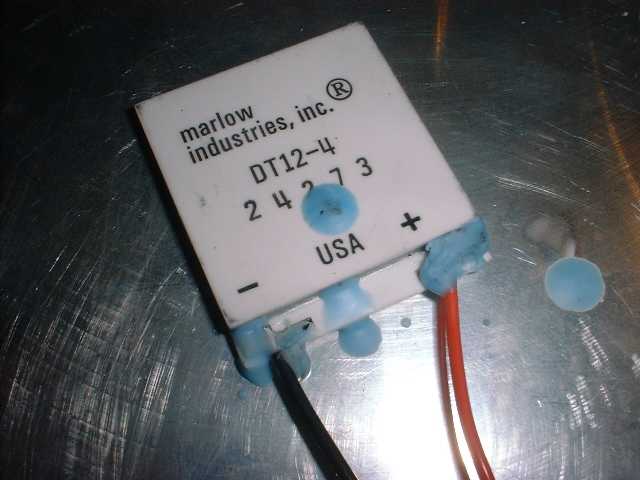
previously possible with just a heat sink and fan. Sooo... I decided to pick up
some off of Ebay and play with them. I put down $24 for two, including S&H, they
will be arriving in a week or so.
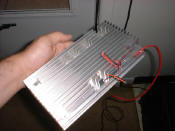
Now that I have the
peltiers taken care of, I need to get a large heat sink to cool the hot side of
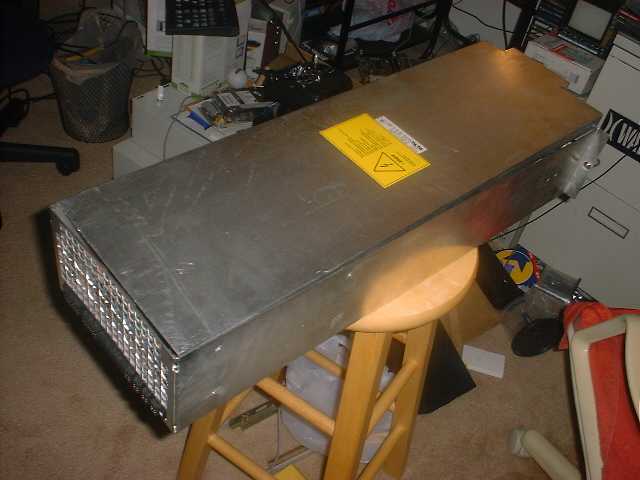
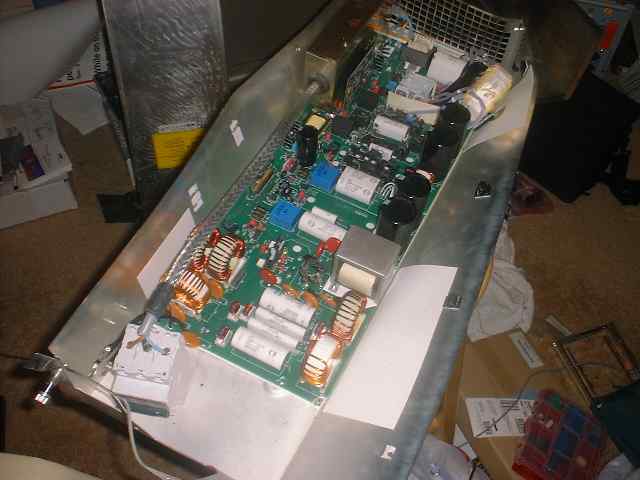
the peltier so it doesn't burn up. Luckily for me, I just happen to have a dead
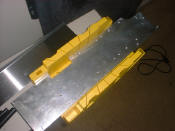
3.3kW power unit to snag parts from.
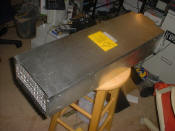
Cover on, cover off. Unfortunately that
fan is a 48V unit, I won't get to reuse it.

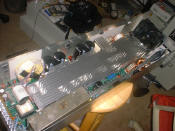
I had to really mangle it to free the
heat sink. I was bummed out, I had plans for that case... oh well. It has sat in
my closet for 3 years now, I can throw it out without feeling too bad about it
now ;-).
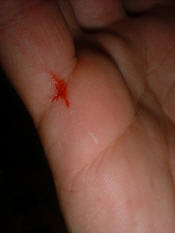
It's a real project now, I've spilt
blood for it.
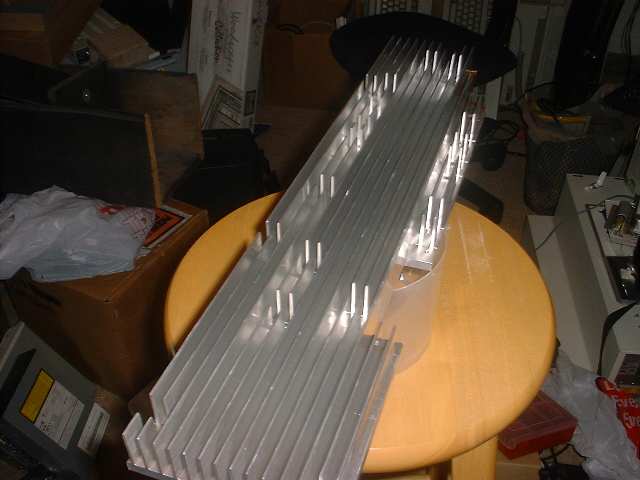
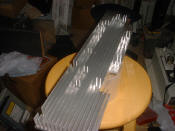
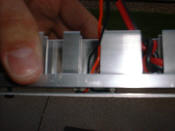
So, next I just need to
hacksaw it into two battery sized pieces so the battery can be sandwiched in
between. Actually I plan to make it large enough to cool two batteries at once,
as well as be a general purpose cooling device for whatever else comes up.
4-30-03
I stopped by Lowes and
picked up a plastic miter box for $10. It included the saw and a 10' measuring
tape, and since I needed a new measuring tape it was the perfect deal.
The bottom of the heat sink. It just
fits in my miter box.
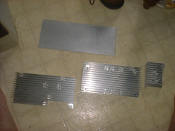
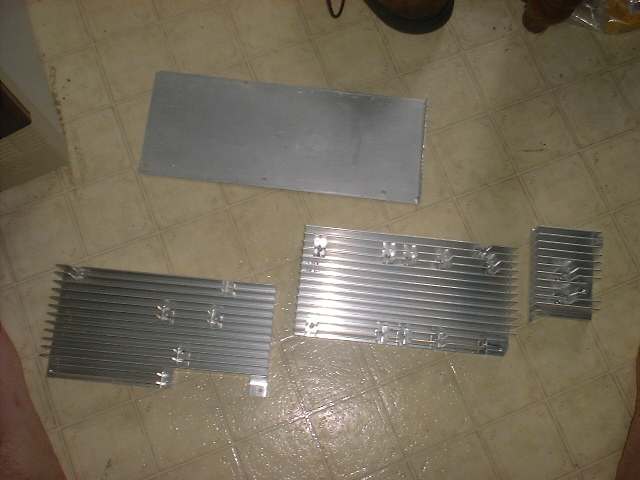
Afterwards. The little heat sink piece
on the far right is leftover. The aluminum sheet at the top will be used to
sandwich the peltier to the heat sink.
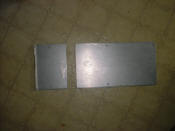
The separator sheet of aluminum cut to spec. This miter box is
the best investment I've made recently. I have never had anything done with a
hacksaw come out so clean looking ;-).
5-3-03
My peltiers came yesterday! Woohoo! I was
able get something together to test at least.
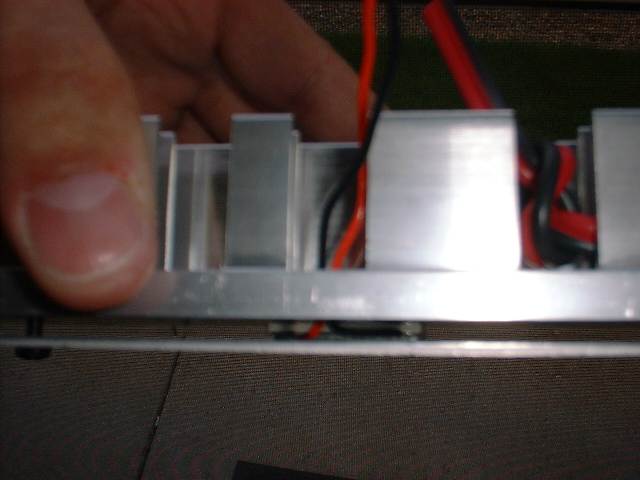
The slots in the fins where already there, they have come in
handy for routing cables. You can see the peltier sandwiched between the heat
sink and the aluminum sheet, the wires run up through a hole in the heat sink.
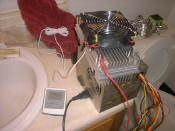
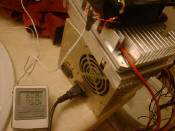
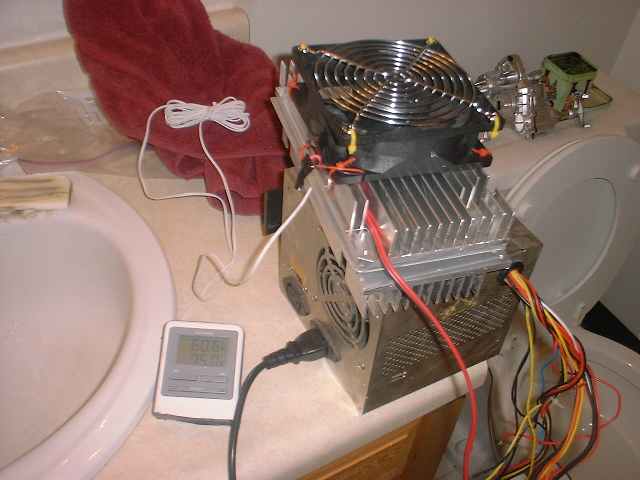
Here you see my 12v power
supply (Old pc AT supply). Supposedly this is a 40W peltier which should draw
3.3A. My power supply has 8A available on the 12v line so this was plenty for a
test. You can
see from the pictures that there is a 15 degree difference from the room
temperature (Bottom, 75) and the peltier's cold side (Top value, 60). I didn't
time this, but I would have to guess that it took 10 minutes to get to this
result. When I took it outside and connected it to my car battery, I got some
unexpected results. Initially I got a 15 degree difference in temperatures in
about 10 minutes again. Then that decreased to only a 12 degree difference. It
was about 60 outside, I was getting a reading of 47.7 degree's on the peltiers
cold side.
I had hoped to get an even
wider temperature difference, especially using my car battery with virtually
unlimited current available. So anyway, I tried cooling a hot battery. After 5
minutes (Per my requirement of cooling a battery in 5 minutes) I had one small
cold spot in the middle of the battery with the rest still hot. The cold spot
warmed up quickly to the temperature of the rest of the pack. So, this means I
will need several peltiers lined up the length of the pack to work as I am
wanting (And most likely just cool one pack at a time rather than two as I had
wanted to do). The other peltier I purchased on Ebay was not exactly what they
advertised, but it will probably work out better for me. It was actually two 6v
peltiers in series. I believe I left it at my friends house last night, so I
won't get to try it for a day or two.
Conclusion: this isn't going
to work as I had hoped it would. If I can get a couple more peltiers this could
still maby work. Maby this first peltier isn't as powerful as advertised (It was
not boxed or anything, I can only take their word on it) or maby a 40W peltier
just doesn't create as wide a difference in temp as I had expected. I may just
have to get some higher wattage units. I want frost on those suckers! ;-). I had
hoped to be able to run this indoors, but if I go much more that 80 watts I
don't think I can come up with a power supply to run it. We shall see.
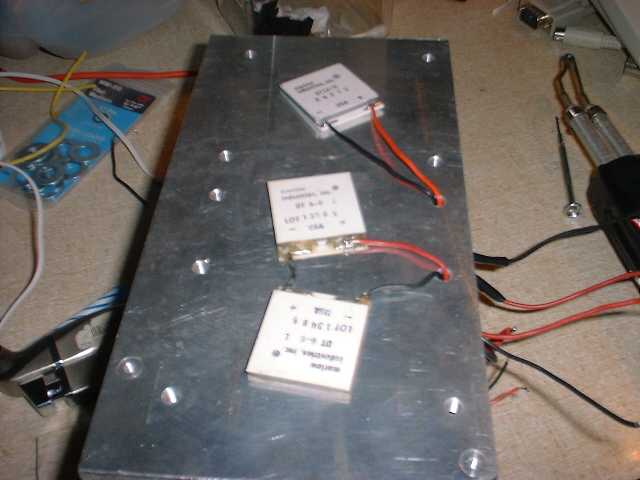
5-15-03
I got my first real test in today. I have
been using it off and on since I got it working, but I have only been cycling
through my batteries once in a day, so there really wasn't much benefit too
cooling. Also I only had one peltier in the unit instead of all three that I
have. The two 6v units in series cool to the same temperature difference of 15
degrees, but they get there quicker and seem to draw much more moisture to the
surface of the heat sink. I don't know what that means, but it seems good, lol.
Ok, down to the numbers. I cycled through
my batteries at least twice, maby three times if I recall. My cooling unit
doesn't get a battery completely cool in 5 minutes per my original guidelines,
however I found I could stage the process and make up for that. Essentially I
can put one battery on the charger hot while it is in the cooler. Midway through
that charge I have already exhausted another battery, it can go in the unit
also. By the time the first battery is done it is at or below room/outside
temperature. The staged battery is also cooled down now, and ready for charging.
And by this time, I have a third battery used up and he can be staged next to
the currently charging battery.
Currently I am just sitting the cooling
unit on top of the batteries so they are sandwiched between the heat sinks. I
have some small bungee cords I want to use to hold the batteries tighter and
hopefully make better contact so heat can be dissipated quicker. I don't expect
to actually get a measurable improvement in cooling speed, but it seems like a
good thing to do.
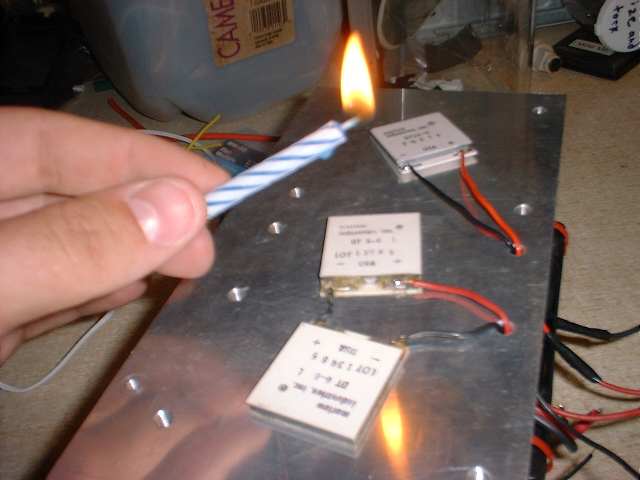
Below are some pics of adding the other two
peltiers. I used candle wax to insulate the solder leads against moisture.


Other notes and items of mention
Moisture forming on the cold
side of the cooling unit was a bit more than anticipated. During my first real
test it was apparently somewhat humid out. Before I had only tested indoors and
with a short outdoor test. My packs themselves never got cold enough to draw
moisture on them, but the cooling unit left a fair amount of moisture on the
packs. While not enough to worry me, it could ruin the stickers on the packs. If
you are using packs without heat shrink wrap on them, you definitely want to put
them in a zip-lock bag or something to prevent rust on your battery ends and
tabs.
Something that I am concerned
about is the configuration of my new packs I want to build. I want a normal 6
pack and then another 4 batteries on top for a 10 cell pack. That means one side
of the pack will be too far away to really benefit from the cooling unit. I will
have to try and see how these new packs respond once I get them.
|